
How to Transcribe a Microsoft Teams Meeting

How to Transcribe a Microsoft Teams Meeting
If you regularly attend business meetings or online lectures on Microsoft Teams, then you'll understand how challenging it can be to keep on top of note-taking while also staying focused and properly engaging with what's being discussed.
That's where Teams meeting transcriptions come in handy.
Take the stress out of note-taking and minute-taking by letting someone else (or better yet, your computer) do it for you!
In this guide we'll walk you through how to transcribe your Teams meeting in two different ways: using the MS Teams live transcription service, and using a specialist transcription service like Transcribe. Not sure which option is right for you? Keep reading and we'll help you decide.
But first...
Why transcribe a Teams meeting?
Trying to take detailed meeting notes can be challenging at the best of times. You're busy trying to keep up with what's being said, and next thing you know you're completely lost, confused, and flustered.
Here's how transcribing a Teams meeting can help:
- Stay focused in important meetings, lectures, and seminars
Put your pen down. Close down that Word document. By transcribing a meeting using software instead, you can stay fully focused and contribute more effectively in those important meetings.
- Get searchable, shareable notes just minutes after the call has ended
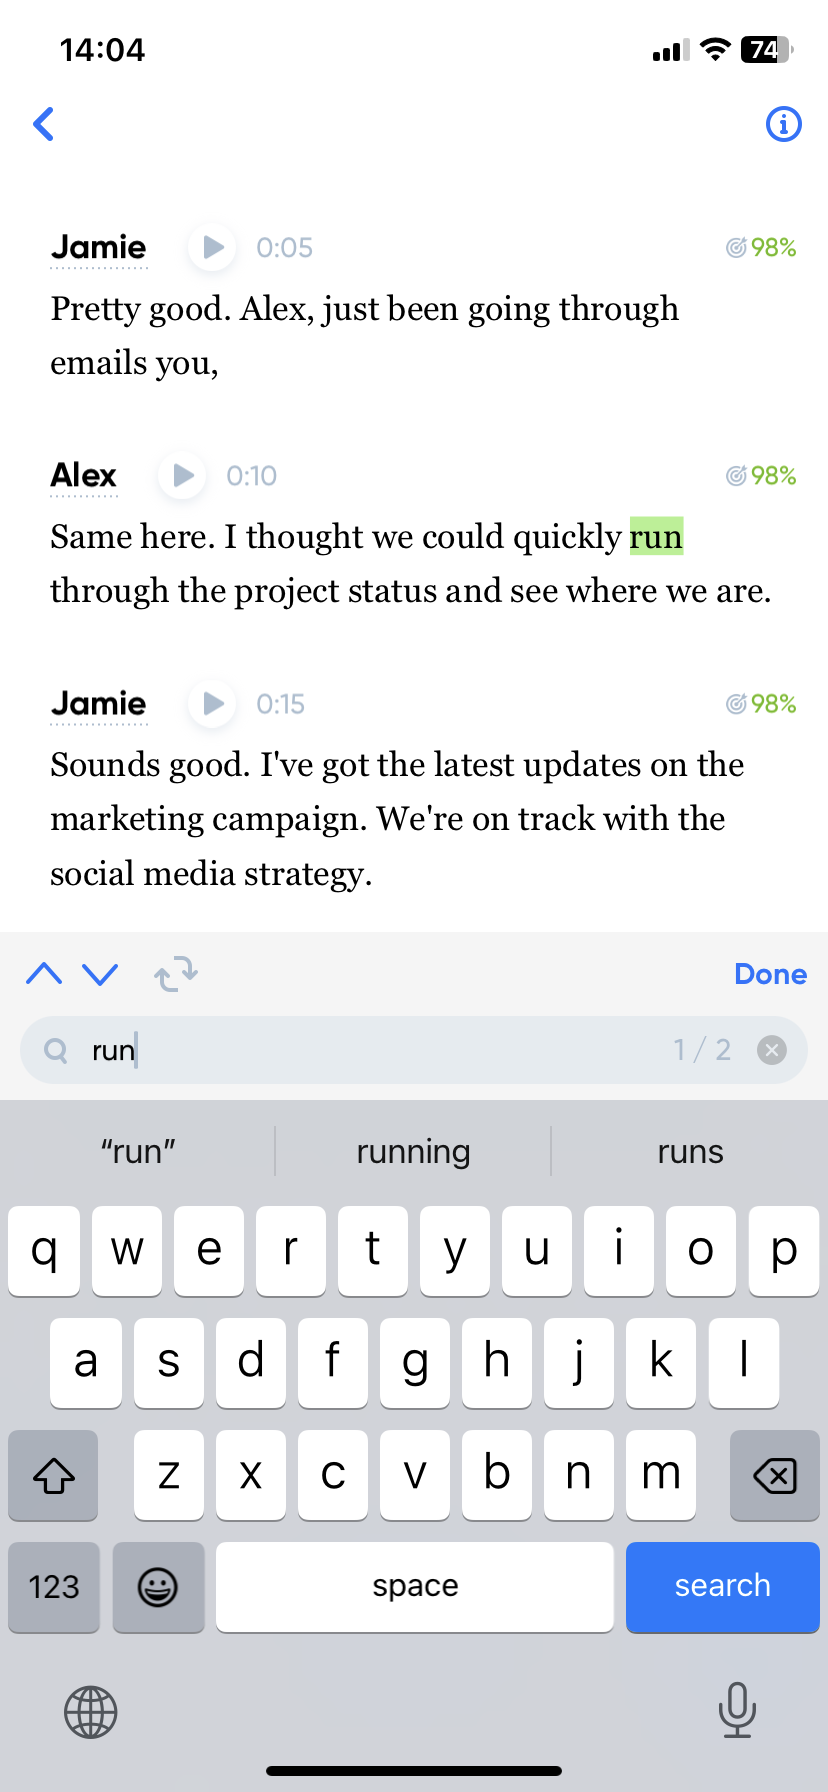
Thanks to clever AI-powered software, you'll receive searchable, shareable notes within minutes of the meeting ending. Search for key points, edit the transcript to remove unnecessary sections, then share with colleagues and peers for reference.
- Increase accountability and improve follow-ups
Transcribing your Teams meetings and sharing the minutes ensures that everyone is on the same page about action items. This way, responsibilities are clear, and there's no room for the 'I didn't know' excuse.
Read more: How to take meeting minutes
- Improve accessibility
Transcriptions of Teams meetings enhance accessibility for a range of audiences. For those who are deaf or hard of hearing. For individuals who are more comfortable reading than listening, especially in languages they're less fluent in. And for people who couldn't attend the meeting, Teams transcripts help them to quickly catch up on key discussions and decisions.
How to transcribe a Microsoft Teams meeting
There are different ways to get a transcript from a Teams meeting, including using Teams' built-in live transcription offering, or using a third-party transcription tool like Transcribe.
In this next section, we'll walk you through both of these methods step by step.
Transcribing a Teams meeting on Microsoft Teams
Firstly, here's how to transcribe in Teams, using the built-in live transcription feature.
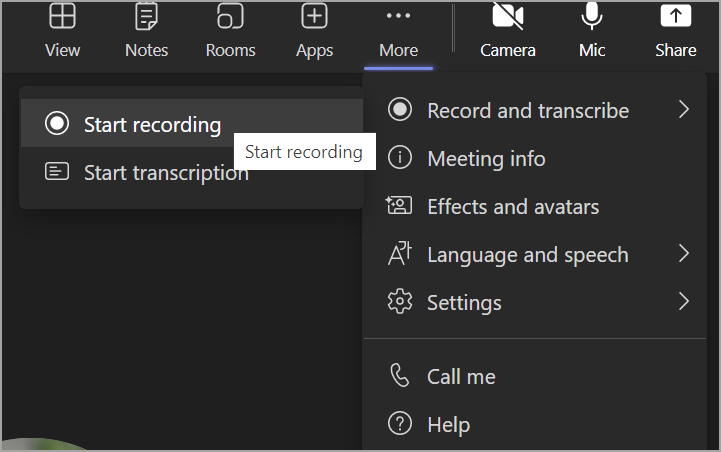
1. Start the transcription
To turn on transcription in Teams, click the 3-dot icon at the top of the Teams window (...). Choose "Record and transcribe", then click "Start transcription".
Note: Only the meeting organizer or presenters can do this.

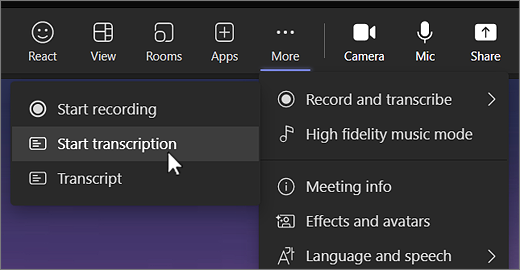
Image credit: Microsoft Teams
2. Choose the language
You'll see the live transcription on the right hand side of your screen. At the top right of the transcript window, click the 3 dots, then click "Change spoken language" and confirm your choice.
Note: The transcript language must be the same as the language being spoken in the meeting.
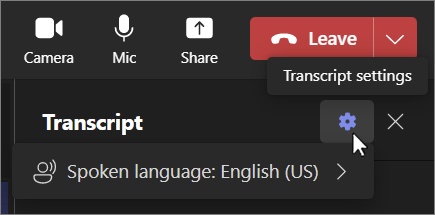
Image credit: Microsoft Teams
3. Hide or show
You can select whether you want the live transcription hidden or shown by clicking the 3 dots at the top of the screen and then selecting "Hide transcript" or "Show transcript".
4. Stop transcription
When you're ready to stop transcribing, click the 3 dots and then click "Stop transcription" or "Stop recording" (if a recording is in progress). The transcription will also stop automatically once all participants have left the meeting.
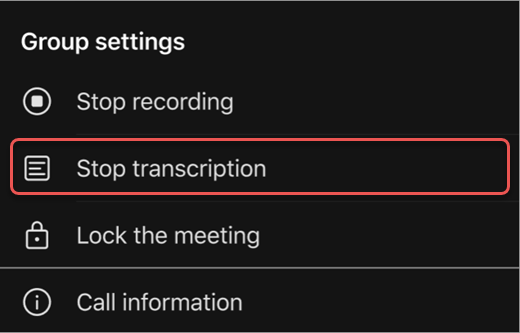
Image credit: Microsoft Teams
5. Download your transcription
To download the transcription from Teams, go to your Teams calendar once the meeting is over, open the meeting event, select the transcript and download it as a .docx or .vtt file.
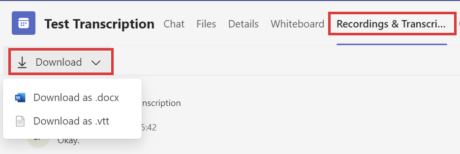
Image credit: Microsoft Teams
Transcribing a Teams meeting using Transcribe
Another easy way to transcribe a Teams meeting is to use a specialist transcription service like Transcribe. Transcribe uses advanced AI technology to turn your meeting recordings into clear and accurate transcripts just minutes after your meeting has ended.
Here's how to record a Teams meeting and transcribe the recording with Transcribe.
1. Start recording your meeting
Once you're in your meeting, click the 3-dot icon at the top of the Teams window (...) and then click "Start recording". When the meeting has finished, go to the same place and click "Stop recording".
2. Download the recording
If you're meeting in a channel, the recording shows up in the meeting chat or channel conversation for you to download. Otherwise it is saved in SharePoint or OneDrive.
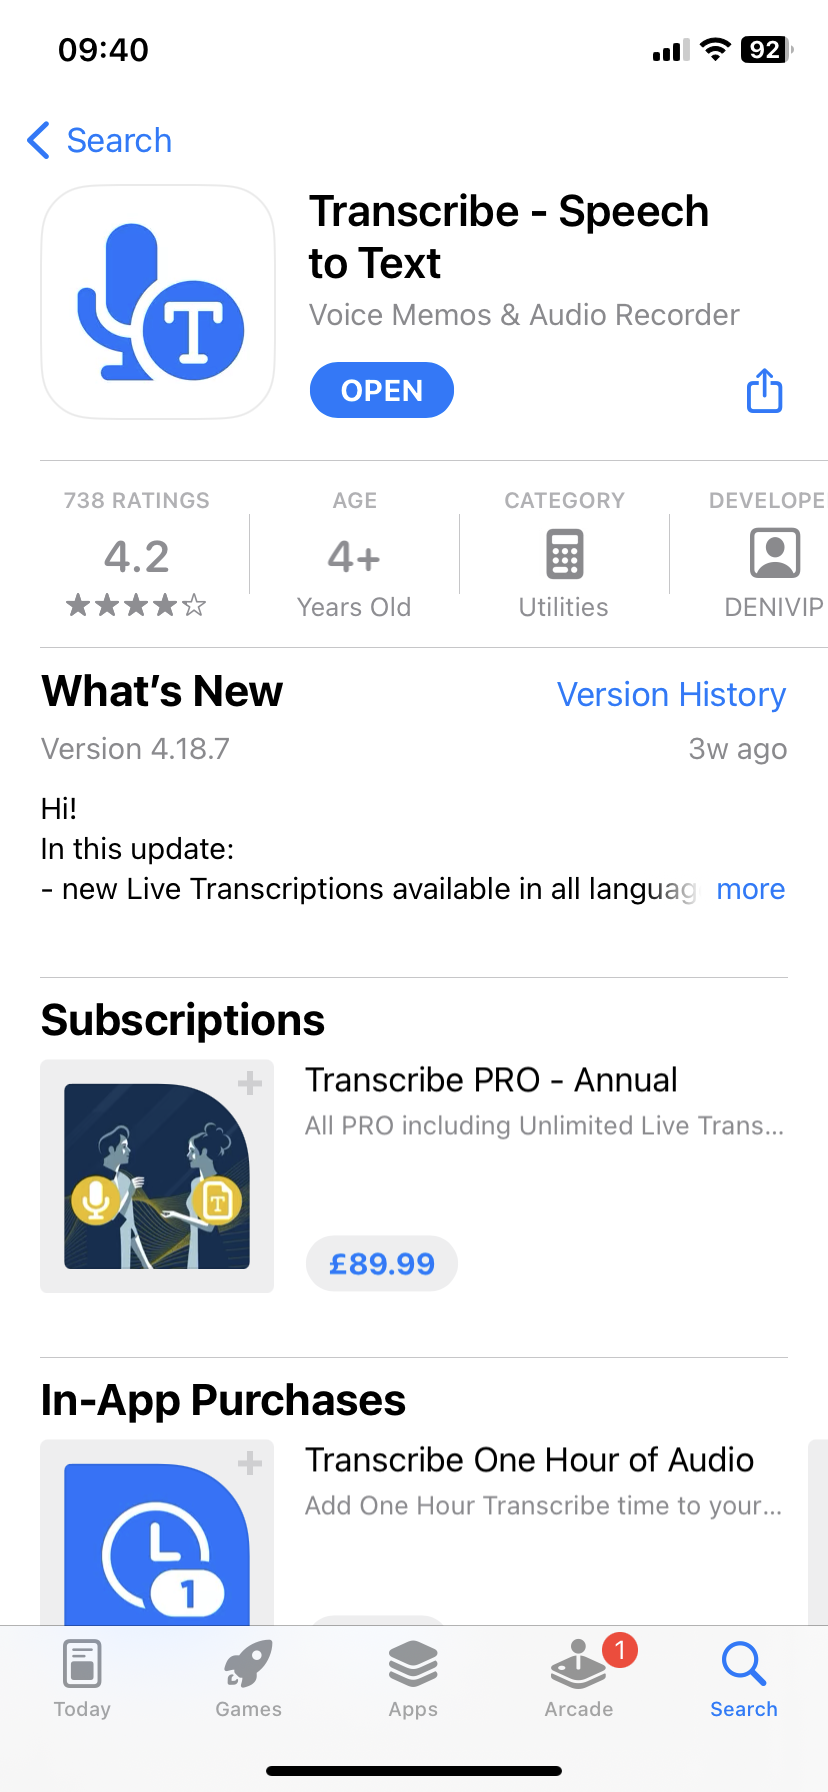
3. Download the Transcribe app or launch the online editor
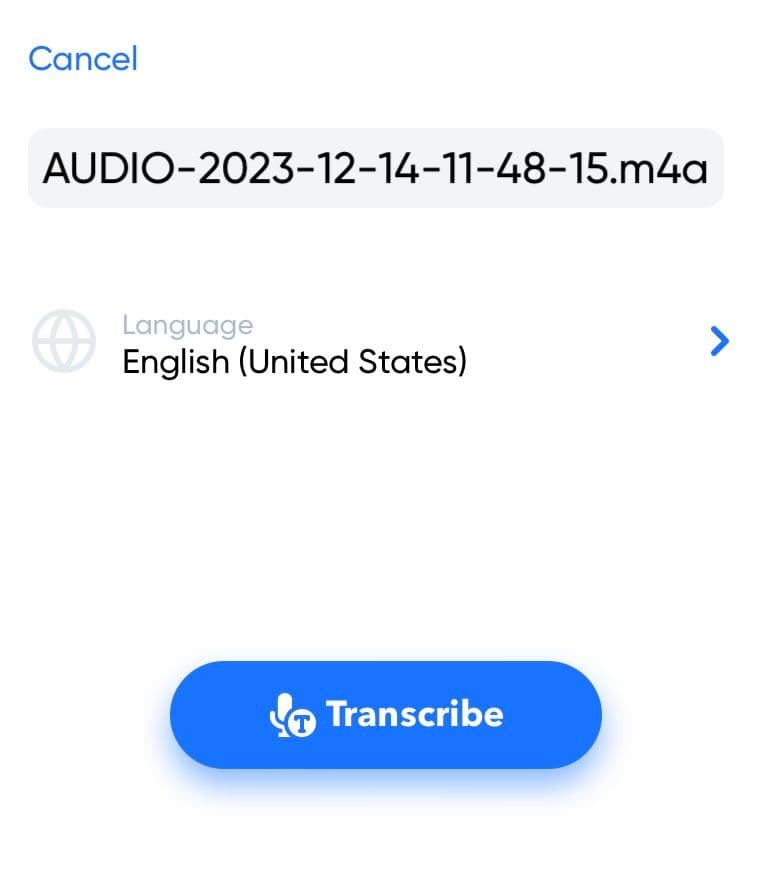
4. Upload your recording to Transcribe
You can import the recording from any app or cloud storage system, including SharePoint and OneDrive.
5. Choose your language
Select the language of your recording from more than 120 languages and dialects.
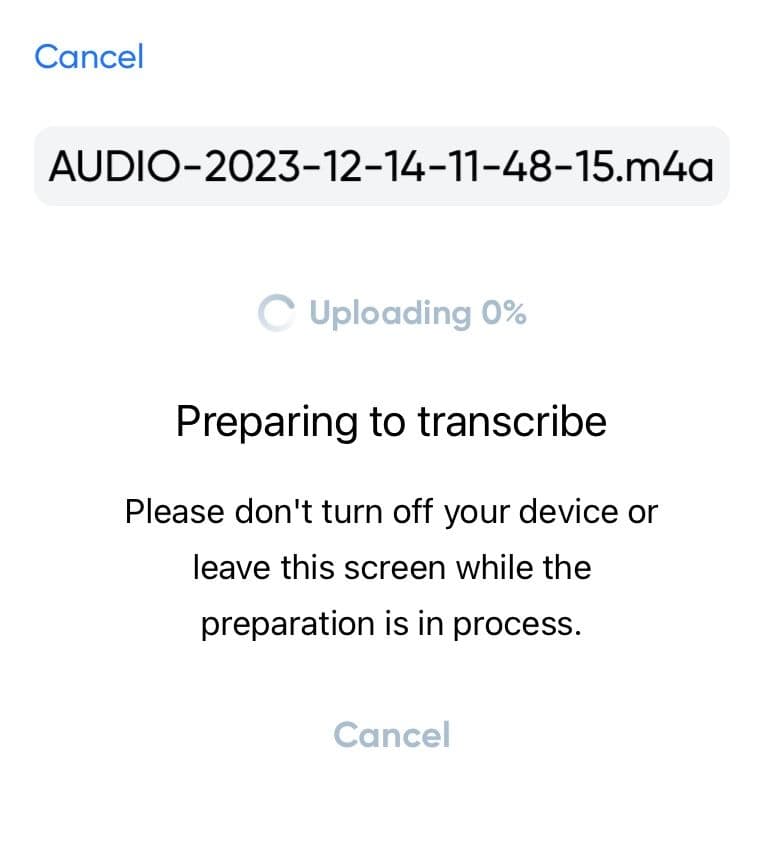
6. Start the transcription process
Your transcription will be ready in a matter of minutes thanks to our high-speed AI software, so sit back and relax, and we'll send you a notification when your transcription is complete.
7. Your transcription is ready!
Now that your Teams transcription is ready, you can skim-read, search for key points and edit it in the app, online or in your preferred file format. With our PRO service you can export to TXT, PDF, DOCX, JPG and SRT.
Use the transcript to create a meeting summary, revision notes, subtitles, training material, reports, articles - whatever your business or academic objectives!
Find out more about how to edit your transcript.
Live Teams transcription vs transcribing a Teams recording: Which option is right for you?
You know how to do it, but which transcription method is best for you? This depends on what you want out of it.
The pros and cons of Teams' live transcription
Microsoft Teams' live-transcription feature is useful for improving accessibility during the meeting itself, making your meeting more inclusive in real time for participants who are deaf or hard-of-hearing, or who might find it easier to understand the language used when it's written down. It can also benefit participants in noisy places who might struggle to hear the audio.
However, if your organization is using OneDrive for Business and SharePoint for meeting recordings, then your IT administrator has to enable the live transcription feature for you to be able to use it. Additionally, only the meeting organizer and presenters can start the transcription, and if it isn't started at the beginning of the meeting, then you can't get a transcript retrospectively.
For these reasons, this isn't necessarily the best option when you want a transcription to read through and use after the meeting.
The pros and cons of transcribing a Teams recording
Having a video transcription post-meeting is useful for creating summaries and for referring back to once the meeting has ended. Many users complain about how long it takes for transcriptions direct from Microsoft Teams to be made available after the meeting has ended, but there are quicker alternatives.
With a professional, paid-for transcription service like Transcribe, you'll get accurate transcripts just minutes after the meeting has drawn to a close. All you need to do is record the meeting then leave the rest up to us.
Meeting recordings on Teams also have to be started by the meeting organizer or presenters, however once the call ends, the recording is available to all attendees. Simply download the recording and upload it to Transcribe.
Once you've received the transcription, you can use our app or online editor to skim the document, search for key points in the meeting and create summaries that you can refer back to or share with your colleagues, classmates or clients. Export the notes in your chosen format, or get a shareable link for online collaboration.
Ready to transcribe your Teams meetings?
Download the Transcribe app or launch the online editor to get started.

How to Transcribe a Zoom Meeting
Manage your workflow and save precious time by transcribing your Zoom meetings with Transcribe. Learn how to transcribe a Zoom meeting with our handy guide.

How to Transcribe a Google Meet Recording
Whether you use Google Meet for work or school, say goodbye to note-taking by learning how to transcribe a Google Meet recording automatically with our handy guide.